
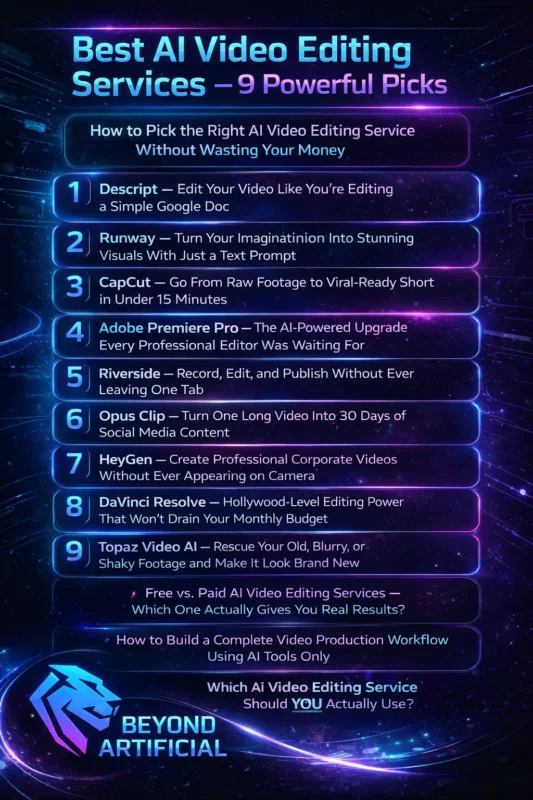
Best AI Video Editing Services – 9 Powerful Picks(Blog#:76)
You just spent 6 hours editing one video, and it still does not look right. That is exactly why the best AI video editing services are becoming a game-changer. They turn hours of frustrating work into minutes of clean, ready-to-publish content.
Whether you are a tired YouTuber, a busy business owner, or a beginner confused by editing tools, these 9 powerful AI picks give you a simple way out. Smart creators today do not work harder; they let AI handle the heavy work and focus on what really matters: their message, their audience, and their growth.
If you have ever looked at your messy timeline and thought, “There has to be an easier way,” you are in the right place.
If you are still unsure which tools actually work in 2026, you should first explore the best AI tools for video editing in 2026 to understand what’s driving real results today.
How to Pick the Right AI Video Editing Service Without Wasting Your Money.
Choosing the wrong AI video editing service does not just waste money; it drains your time, energy, and creativity. Before you spend anything, ask yourself 3 simple questions: What kind of videos do you make? How comfortable are you with tech? How much can you honestly spend every month? Most people skip this, get distracted by fancy features, and end up with a tool that feels harder than editing itself.
Important tip: Start with a free trial. 30 minutes of real testing tells you more than 30 reviews ever will. Tip 2: Be careful with credit-based pricing. Some tools look cheap but quickly drain your budget once you start using them. Tip 3: Choose based on your platform. For YouTube, go for tools like Descript (better for long videos). For short content, CapCut is faster and easier.
Smart creators do not pick the most popular tool; they pick the one that fits their workflow and makes editing feel simple again.
1. Descript: Edit Your Video Like You’re Editing a Simple Google Doc.
If you have ever sat at midnight staring at a messy timeline, trying to cut one “umm” from hours of footage, Descript was made for you. It works like a document, not a traditional editor. You upload your video, it turns speech into text, you delete words, and your video edits itself automatically. No complicated timeline. No endless scrubbing.
It is used by millions of creators and can cut your editing time by 60–70%, meaning 4 hours of work can drop to under 1 hour.
Simple tips to use this tool better. Tip 1: Turn on Studio Sound first. It removes background noise and makes your audio sound clean and professional instantly. Tip 2: Use Underlord AI for rough cuts. Tell it to remove filler words and bad takes. Instead of searching manually, you just review, saving tons of time. Tip 3: Watch your credits
Features like Studio Sound and voice tools use credits, so keep an eye on usage. The Creator plan ($24/month) is enough for most people. Tip 4: Use a hybrid workflow. Do your rough editing in Descript, then export to tools like Adobe Premiere Pro or DaVinci Resolve for final polish.
Descript is not about making editing fancy; it is about making editing fast, simple, and stress-free. Once you understand how to automate video editing with AI, tools like Descript become even more powerful and time-saving.
2. Runway: Turn Your Imagination Into Stunning Visuals With Just a Text Prompt.
Imagine typing one simple line, “a cinematic sunset over a neon Tokyo street”, and a realistic video appears in seconds. That is what Runway does. No camera. No crew. No editing skills. Runway uses its Gen-4 AI to turn ideas into videos. You can create clips from text or images, remove backgrounds, add slow motion, erase objects, and even change styles.
It is trusted by filmmakers, marketers, and creators who want scroll-stopping visuals without spending hours editing. Simple Tips to use it better in a better way: Tip 1: Write better prompts. Follow this format: Subject + Action + Environment + Camera + Lighting + Mood. Clear prompts are equal to better results. Tip 2: Use Motion Brush. Animate only specific parts of your image while keeping the rest still. Perfect for turning simple visuals into eye-catching videos.
Tip 3: Watch your credits. AI generation uses credits fast. Test carefully and save credits for your best ideas. Tip 4: Use the right tool combo. Runway is best for cinematic visuals. For talking videos, pair it with tools like HeyGen or Descript. Runway does not just help you edit; it helps you create videos from nothing.
3. CapCut: Go From Raw Footage to Viral-Ready Short in Under 15 Minutes.
If you have ever spent hours editing a 60-second Reel… and still felt like it was not good enough, CapCut was made for you. It is a free, AI-powered editor designed to turn raw footage into clean, ready-to-post videos in minutes, even if you have never edited before. No stress. No complicated tools. CapCut helps you go from idea to finished video in under 15 minutes. It adds captions, removes backgrounds, follows trends, and even builds videos from a simple prompt.
That is why so many creators use it for TikTok, Reels, and Shorts. Simple Tips to Use It Better Tip 1: Turn on auto-captions right away. Most people watch videos without sound. CapCut adds clean captions in seconds, no manual work needed. Tip 2: Use bilingual captions. You can show two languages in one video. Great if you want to reach a wider audience. Tip 3: Use Auto Reframe. It quickly turns horizontal clips into vertical (9:16). No need to adjust everything manually.
Tip 4: Be careful with sensitive content. CapCut is owned by ByteDance, so avoid uploading private or client videos without checking settings. CapCut isn’t about making editing perfect. It is about making it fast, simple, and actually doable every day.
4. Adobe Premiere Pro: The AI-Powered Upgrade Every Professional Editor Was Waiting For
If you have ever spent hours cutting clips or tracking one object frame by frame…You already know how exhausting editing can get. That is exactly what Adobe Premiere Pro (now called Premiere) is trying to fix with its new AI updates. Instead of doing everything manually, Premiere now uses AI to handle the slow, painful parts. You can track objects in one click, search your footage like you are using Google, extend clips that end too early, and even generate captions in different languages, all inside the editor.
It is still a professional tool, but now it actually saves you time instead of taking it. Simple Tips to Use It Better. Tip 1: Start with text-based editing. Turn your video into text, find the parts you want, and add them to your timeline. This alone can cut your editing time by half. Tip 2: Fix cuts with Generative Extend. If a clip ends too fast, extend it slightly and add a smooth audio transition. Your edits will feel natural and clean.
Tip 3: Use Enhanced Speech first. Clean your audio in one click before anything else. It makes a huge difference instantly. Tip 4: Watch your AI credits. Features like Generative Extend use credits, especially in 4K. Plan before you start heavy editing. Premiere is no longer just a powerful editor; it is becoming a smart assistant that removes the hardest parts of editing.
5. Riverside: Record, Edit, and Publish Without Ever Leaving One Tab.
If you have ever recorded a long interview… and the final video came out blurry, laggy, or with bad audio, you know how frustrating that feels. That is exactly why Riverside exists. Riverside records everything locally on each person’s device, not over the internet. So even if your guest has bad Wi-Fi, your video still comes out clean and high quality (up to 4K).
And the best part? You can record, edit, create clips, add captions, and publish, all in one place. No switching tools. No extra work. Simple Tips to Use It Better. Tip 1: Fix mistakes with AI. If someone says something wrong, just edit the text. Riverside will fix the audio and video automatically, no re-recording needed. Tip 2: Export for advanced editing. If you want more control, export your project to Adobe Premiere Pro. Everything stays synced and ready.
Tip 3: Ask guests to use Chrome (on laptop). It works best on a desktop. Mobile recordings can cause issues later. Tip 4: Use Magic Clips first. Right after recording, let AI find the best moments. It saves time and gives you strong content to start with. Riverside is not just a recording tool; it is like having a mini production team that handles everything for you.
6. Opus Clip: Turn One Long Video Into 30 Days of Social Media Content.
If you have ever recorded a great 60-minute video… But then, you felt too tired to turn it into clips, you are not alone. That’s exactly where Opus Clip helps. Opus Clip takes your long video and automatically finds the best moments. It turns them into short, ready-to-post clips with captions, proper framing (9:16), and even a structure that keeps people watching. Instead of spending hours cutting content, you get weeks of social posts in minutes.
Tools like Opus Clip work best when you understand how retention editing doubles your views and keeps people watching till the end.
Simple Tips to Use It Better. Tip 1: Understand how credits work. 1 credit = 1 minute of video. So a 60-minute video uses 60 credits, no matter how many clips you get. Tip 2: Always review the clips. The AI is good, but not perfect. Check everything before posting; some clips may need small fixes. Tip 3: Use ClipAnything for non-talking videos. It works on visuals too (like vlogs or events), not just speech.
Tip 4: Cancel carefully. If you stop your plan, confirm it properly to avoid extra charges. Opus Clip does not replace your creativity; it just removes the hardest part: turning long content into consistent, high-quality posts.
7. HeyGen: Create Professional Corporate Videos Without Ever Appearing on Camera.
If being on camera makes you uncomfortable… Or you have been delaying videos because you do not have a studio or team, HeyGen is made for you. You just write your script, pick an AI avatar (or create your own), and it turns your words into a professional video. No camera. No recording. No stress. It can even speak in different languages with natural expressions and lip-sync, all in minutes.
Simple Tips to Use It Better. Tip 1: Watch your credits. Advanced avatars use more credits per minute. Plan your video length before generating. Tip 2: Keep your script simple. Short sentences + small pauses = more natural delivery. This makes your video feel real, not robotic. Tip 3: Leave space for captions. If you translate your video, some languages take more space. Plan your layout so that the text does not look messy. Tip 4: Use it responsibly. Only use your own voice or someone’s with permission.
AI tools are powerful, but should be used ethically.
HeyGen does not just help you create videos; it removes the fear and effort that usually stop you from starting.
8. DaVinci Resolve: Hollywood-Level Editing Power That Won’t Drain Your Monthly Budget.
If you have ever felt stuck choosing between expensive editors or free ones full of watermarks… There is a better option. DaVinci Resolve gives you a full professional editing studio for free. You can edit videos, do color grading, add effects, motion graphics, and fix audio, all in one place. And it is not some basic tool.
It is used in real films and high-end projects.
Simple Tips to Start. Tip 1: Start with the Cut page. It is faster and easier for beginners. Move to the Edit page later when you feel comfortable. Tip 2: Use it for quality work
If you want high-quality videos, Resolve is perfect. For quick social content, tools like CapCut are faster. Tip 3: Use a good PC (with a GPU). A dedicated graphics card makes a huge difference in performance. Tip 4: Fix “media offline” easily. If clips go missing, just relink them in the Media Pool. It is a common issue and easy to fix.
DaVinci Resolve is not just free; it is one of the most powerful editing tools you can use without spending anything.
9. Topaz Video AI: Rescue Your Old, Blurry, or Shaky Footage and Make It Look Brand New.
You know that feeling when you find an old video…something important… but it is blurry, shaky, and hard to watch? That is exactly what Topaz Video AI is made to fix. You know that feeling when you find an old video… something important… but it is blurry, shaky, and hard to watch? That is exactly what Topaz Video AI is made to fix.
Simple Tips to Use It Better. Tip 1: Pick the right AI model. Different models work better for different videos. Use Iris/Nyx for faces or low light, and Proteus for general sharpening. Tip 2: Use 2-step processing for old videos. First fix interlacing → then upscale. This gives much cleaner results. Tip 3: Use batch processing. Add multiple videos and let it run overnight. Saves you hours of waiting.
Tip 4: Test before full export. Render a short preview first. It helps you avoid wasting time on wrong settings. Tip 5: Expect slower processing on weak PCs. Stronger systems (especially Apple Silicon) run much faster. So do not worry if it feels slow; that is normal. Topaz Video AI isn’t about editing; it is about bringing your old memories back to life in the best possible quality.
Free vs. Paid AI Video Editing Services: Which One Actually Gives You Real Results?
Let’s be real. You download a “free” video editor, spend hours editing…And at the end, there is a watermark or a paywall. Yeah, that feeling hurts. Here is the truth: Free tools like CapCut and DaVinci Resolve are actually very good, but many tools hide limits like exports, storage, or locked features. So, going in blindly? That’s where most people get stuck. What actually matters in 2026. The difference between free and paid tools is not quality, anyway. It’s speed and extra features. For most creators, free tools are more than enough to make professional content.
Simple Tips (that save you time and money).Tip 1: Test with a real project. Do not test on a small clip. Use your actual footage; that is where tools show their real performance. Tip 2: Start with CapCut. It gives high-quality exports and strong AI features without watermarks. Perfect for beginners. Tip 3: Use DaVinci for serious work. If you want pro-level editing, it’s one of the best free options. And the paid version is a one-time cost, no monthly stress. Tip 4: Pick based on your needs
Beginners → try simple tools. Advanced users → use tools like Descript for faster workflows
The smartest creators don’t chase the “best” tool. They pick the one that fits their work and makes life easier.
How to Build a Complete Video Production Workflow Using AI Tools Only.
If you have ever looked at a blank screen and thought, “I have to script, record, edit, add captions… all by myself?” You are not alone. That overwhelm is exactly what AI is meant to fix. Before, making one video meant many steps: idea → script → shoot → edit → publish.And usually… different tools (or people) for each step. Now? You can do everything yourself, faster and simpler. A Simple AI Workflow That Actually Works
Step 1: Write your script. Use tools like ChatGPT or Claude. Get your ideas and script ready. Step 2: Create visuals. Use Runway or similar tools. Turn your script into video scenes. Step 3: Edit fast.Use Descript. Remove filler words, clean your video quickly. Step 4: Final touches + captions. Use CapCut. Add captions and format for social media
Smart Tips (Most People Skip).Tip 1: Do not do everything at once. Build your workflow step by step. Each tool should do one job well. Tip 2: Start small. Test tools on a short project first. It saves you from problems later. Tip 3: Think about copyright. Tools like Adobe Firefly are safer for commercial use. The biggest change in 2026 is not quality,
it is speed. Creators using AI can make 5–10x more content. So now the real challenge is not making videos… it is deciding what to create next.
Which AI Video Editing Service Should YOU Actually Use?
Let’s be honest for a second. If you have been scrolling through “best AI video tools” and feel more confused than before, that is normal. Most lists mix everything… and that is the real problem. The simple truth.“AI video editor” does not mean one thing. There are two different types: Tools that create videos from scratch (no camera needed). Tools that edit videos you already have
If you do not understand this difference, you will pick the wrong tool. So what should YOU choose? It depends on what you actually need: For avatar or training videos → HeyGen. For cinematic or creative videos → Runway or DaVinci Resolve. For fast social media content → CapCut.There is no “best” tool for everyone — only the right tool for your goal. Smart tips (that save you time + money)
Tip 1: Track your credits.Many AI tools charge based on usage. One long testing session can burn your monthly plan fast. Tip 2: Save what works. If you get a good result, save your prompts/settings. AI tools change often, and results would not always stay the same. Tip 3: Always test yourself. Do not trust reviews alone. Use your own footage and see what actually works for you. Here is the reality:
AI can save you hours and money, but only if you choose the right tool for your workflow. So don’t chase the “perfect tool”… Just pick the one that makes your process faster and easier. If your goal is growth, you also need to understand how video editing affects the YouTube algorithm in 2026, because editing directly impacts your reach.
FREQUENTLY ASKED QUESTIONS (FAQs)
Which one is the best AI video editor?
There is no single “best” AI video editor; it depends on what you actually need and how you create content. For most creators, start with CapCut (fast & free), use Descript for talking videos, and Runway for creative visuals. The best tool is the one that fits your workflow.
Which AI video service is best?
The “best” AI video service is not one tool; it depends on what you want to create. For most people, use CapCut for fast content, Descript for editing, and Runway or HeyGen for advanced videos. Pick based on your goal, not popularity.
Is Canva better than CapCut?
Canva is better for design and branding, while CapCut is stronger for actual video editing and viral content. If you want fast, engaging videos, choose CapCut, but for polished, branded visuals and templates, Canva is the smarter choice.
Best AI for video editing and creation?
The best AI tool is not one; it depends on whether you are editing videos or creating them from scratch. For most creators, use CapCut for fast editing, Descript for talking videos, and Runway or HeyGen for full AI video creation. Choose based on your workflow, not hype.
Best AI video editing software for YouTube?
The best AI video editor for YouTube depends on your content style and how you create videos. For most creators, use CapCut for fast editing, Descript for talking videos, and Runway or Premiere for advanced YouTube content. Choose based on your workflow, not trends.
Best AI video editing software for YouTube
You spend hours filming a YouTube video….and then editing comes, the part that eats your whole week. It is exhausting. And sometimes it makes you question everything. Here is the hard truth: Most YouTube videos do not even cross 1,000 views. And the difference between creators who grow and those who quit? It is not just thumbnails or posting more. It is having the right tools so you can stay consistent without burning out.
The good news?. You do not need a big setup, a team, or years of experience anymore. AI video editing tools are making things faster, easier, and way less stressful. What used to take days… can now be done in hours.
- What AI video editing can do for you
- Remove filler words, silences, and bad takes automatically
- Add captions in seconds (which helps retention a lot)
- Turn one video into Shorts, Reels, and TikToks instantly
- Improve colors and clean up audio without extra tools
- Find the best moments in your video and turn them into clips
- Even turn a script into a full video
The real benefit is not just saving time. It is getting your energy back… so you can focus on your ideas, your message, and actually enjoy creating again.