
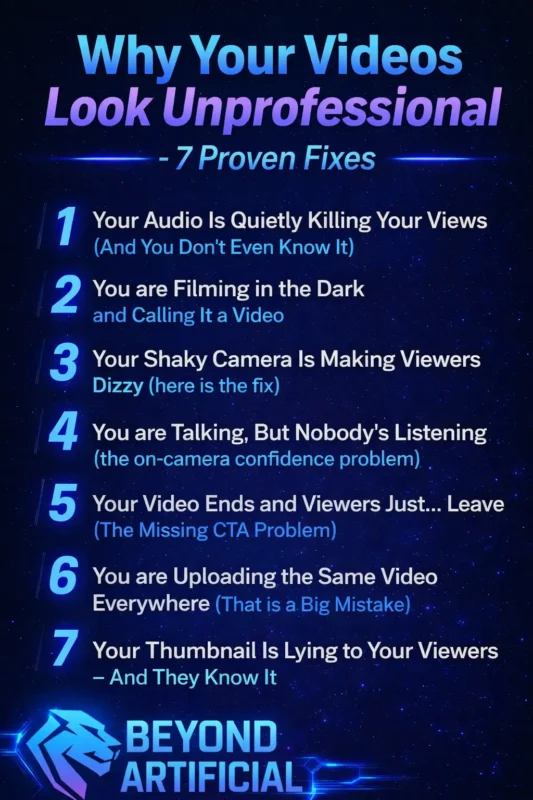
Why Your Videos Look Unprofessional – 7 Proven Fixes (Blog#:69)
You hit publish with full excitement, and then the silence hits harder than you expected. Why your videos look unprofessional is something most creators never dare to search, because deep down, they are already worried about the answer. The truth is, unprofessional-looking videos do not just lose views, they slowly damage your credibility before you even get a chance to speak.
But here is what most people do not realize: the problem is rarely your talent, it is usually a few simple mistakes that even experienced creators make. And the best part? These mistakes are completely fixable.
Once you understand these 7 proven fixes, you will start seeing your videos in a completely different way, and improving them becomes much easier.
If you are struggling with your videos looking unprofessional, you are not alone, many beginners face the same challenges when starting outis video editing hard for beginners is something most creators wonder before they understand what is really holding them back.
1. Your Audio Is Quietly Killing Your Views (and you do not even know it).
You spend hours filming, editing, and trying to make your video perfect, but then someone clicks away in just 10 seconds. Not because your content was bad, but because your audio sounded poor, like it was recorded inside a tin can. Bad audio does not just annoy viewers, it actually makes you seem less intelligent, less trustworthy, and less likable, even if your ideas are great.
The harsh truth is, people can ignore slightly low-quality visuals, but they won’t tolerate audio that hurts their ears. The easiest and cheapest fix is to avoid recording in empty rooms with hard walls, instead, record in a small space like a bedroom or closet, where soft surfaces help reduce echo naturally. If you can invest in just one thing, do not upgrade your camera, get a simple lavalier or USB microphone, because even an affordable mic can sound much better than your camera’s built-in audio.
Also, always clean your audio before publishing by using free tools like Adobe Enhance or Audacity, because background noise that seems okay in headphones can sound very annoying on phone speakers. And before you publish, always check your video on your phone’s small speaker, if the audio sounds clear there, it will sound good everywhere.
Many creators think they need expensive gear to fix their audio, but that is not always true, understanding video editing cost in 2026 can help you make smarter, budget-friendly decisions.
2. You are Filming in the Dark and Calling It a Video.
You put real effort into your content, your message is strong, your energy is there, but the moment a viewer sees a dark, grainy, poorly lit face, their brain quickly decides, this does not look professional. Bad lighting does not just make your video look dim, it makes you look unprofessional, less trustworthy, and easy to forget, before you even say a single word. The worst part? Your normal room light is often the problem. That overhead light above you creates harsh shadows under your eyes and chin, making you look tired, flat, and sometimes even awkward on camera without you realizing it.
The fastest free fix is surprisingly simple, just sit facing a window during the day, place your camera between you and the window, and let natural light fall directly on your face. It works like a professional soft light, and it costs nothing. If you are filming at night or do not have good natural light, use a simple LED ring light or even a desk lamp. Place it slightly above your eye level and angle it toward your face at about 45 degrees, this small change alone can instantly make your video look much more professional.
Also, do not mix different light colors at the same time. Warm yellow light from bulbs and cool daylight from windows together can make your skin look unnatural and dull. It is better to stick to one light source, either use only natural light or only one type of artificial light.
Before you record, do a quick check, turn on your camera, look at yourself on the screen, and ask honestly: Would a stranger trust this person? If the answer is no, your lighting is the first thing you should fix.
3. Your Shaky Camera Is Making Viewers Dizzy(here is the fix).
Nothing makes a video look more careless than shaky, unstable footage, and the hard truth is, most creators do not realize how bad it looks until they watch it later and feel uncomfortable. Shaky footage does not just look unprofessional, it makes it hard for viewers to watch, breaks their focus, and gives the impression that you did not put enough effort into your video.
The surprising part is that most shaking does not come from walking, it comes from small things like your hands moving slightly, your breathing, or zooming in on your phone, which makes every tiny shake look much worse on screen. The easiest free fix is to hold your camera properly, keep your elbows close to your body, lean against a wall for support, and take a slow breath before recording, because this simple technique can reduce shaking a lot.
If you are filming at a desk, do not hold your phone, place it on books, a table, or any stable surface, because a fixed position always looks better than handheld footage. If your video is already shaky and you can not record again, you can fix it using free tools like DaVinci Resolve or even Google Photos by using their stabilization feature, it will not be perfect, but it will look much better.
And if you want to improve even more, a simple phone gimbal can make your videos look smooth and professional instantly without much effort. If you want to speed up your editing and improve quality at the same time, following an AI video editing workflow step by step can completely change how your videos turn out.
4. You are Talking, But Nobody’s Listening (the on-camera confidence problem).
You press record, say everything you planned, and your content is actually good, but something still feels off. Your viewer notices it instantly and leaves within seconds, not because of what you said, but because of how you made them feel while saying it. The truth is, confidence on camera is not just about words, it is about energy. If you sound nervous, stiff, or like you are reading from a script, people feel that and disconnect almost immediately.
Many creators make a common mistake, they stare at the camera with no expression, speak in a flat voice, and keep their body tense. As soon as a viewer senses that discomfort, they lose interest and click away. The easiest way to fix this is simple, stop thinking of the camera as a device and imagine you are talking to your best friend. The moment you picture a real person, your voice becomes more natural, your face becomes more expressive, and you start to feel more relaxed.
Before recording, take one minute to warm up, speak out loud with a bit more energy than usual. This helps your voice and expressions feel natural instead of forced. Try something most people avoid, record a short video and watch it without sound. Focus only on your face and eyes. If you look dull or lifeless, that is exactly how your viewers see you too.
And most importantly, stop trying to be perfect. Focus on being real and present, because people connect more with a genuine person than with someone who feels scripted or fake. If you want, I can make all your remaining sections in this same easy + powerful tone so your whole article feels premium and consistent.
To take your video quality even further, you should explore the best AI tools for video editing in 2026 and start using tools that make your workflow faster and more professional.
5. Your Video Ends and Viewers Just, Leave (The Missing CTA Problem).
You put your heart into your video, your content was helpful, and the viewer even watched till the end, but then nothing happens. No subscribe, no click, no comment… just silence. And the worst part is, they did not leave because they did not like you, they left because you never told them what to do next. Most creators avoid adding a CTA because it feels awkward, like they are being pushy or salesy. But in reality, your viewer is ready to be guided, they just spent time watching your content, and their mind is open for the next step.
Without that direction, it is like giving someone a great experience and then leaving before they know what to do next. Another common mistake is adding too many CTAs at once , “like, subscribe, comment, follow, check the link…” all in one go. This overwhelms the viewer, and instead of doing everything, they end up doing nothing. The simple rule is this: ask for only one thing. Make it clear, specific, and directly connected to your content. For example, instead of saying “subscribe for more,” say “if this helped you today, subscribe because the next video will help you even more.”
Also, do not wait until the very end to say your CTA. Place it right after your best moment, when your viewer is most engaged and trusting you. By the time most people say “do not forget to…”, the viewer has already moved on. Make your CTA feel natural, like you are talking to a friend. Something like, “if this helped you, share it with someone who needs it too” feels much more real than a scripted line.
And finally, always support your CTA with something visual, like on-screen text, a pinned comment, or a card, because when viewers both hear and see it, they are much more likely to take action.
6. You are Uploading the Same Video Everywhere(That is a Big Mistake).
You spend hours filming and editing your video, feel proud of it, and upload it everywhere, YouTube, Instagram, TikTok, Facebook, LinkedIn, but nothing happens. No reach, no engagement. Not because your content is bad, but because each platform looks at your video and decides it does not fit there. The hard truth is, platforms like Instagram and TikTok can detect watermarks from other apps. If you download a video from one platform and repost it on another, the algorithm may reduce its reach before people even see it.
Also, every platform has a different audience mindset. On LinkedIn, people expect value and professionalism. On TikTok, they want fast, fun, and engaging content. Posting the exact same video everywhere might work technically, but it does not connect with the audience emotionally. The easiest fix is to create your main video once, then spend a few extra minutes adjusting it for each platform. Make it shorter for TikTok and Reels, keep it horizontal for YouTube, and turn your best part into a vertical clip for stories. Even changing the first few seconds can make a big difference.
Always remove watermarks before reposting, use tools like CapCut or Canva to export a clean version. This small step alone can help your video reach more people. Do not copy-paste the same caption everywhere. Write a new caption for each platform. What works on YouTube might not work on TikTok, and on LinkedIn, a simple personal story often works better than hashtags.
If managing all platforms feels overwhelming, start with just one or two. Focus on the platform where your target audience is, and do it well, because one strong video on the right platform is always better than posting the same video everywhere without results.
7. Your Thumbnail Is Lying to Your Viewers (and they know it).
Here is a truth most creators avoid: your thumbnail is the first thing people judge before they hear you, see your video, or understand your content. If your thumbnail feels confusing, misleading, or low quality, people scroll past instantly, and your video never gets a chance. The problem usually comes from two opposite mistakes. Some creators use clickbait thumbnails that promise too much but do not match the video, which makes viewers feel tricked and leave quickly. Others use dull or blurry thumbnails that look boring, so no one clicks at all.
Both of these hurt your video. The first destroys trust and makes people leave fast, which tells the algorithm your content is not good. The second simply stops your video from getting clicks in the first place. Before you finalize your thumbnail, do a simple test, hold your phone far away and look at it. If your text is hard to read or your face is not clear, your thumbnail will no work on small screens.
Keep your text short and clear, just one strong word or a small phrase. Combine it with a close-up of a real facial expression like surprise, excitement, or curiosity, because people connect more with emotion than plain visuals. Make sure your thumbnail and title match each other. Your thumbnail should create curiosity, and your title should explain it, together they should make people want to click.
Finally, keep your design simple with one main focus and strong colors. Use bright, contrasting colors like yellow, orange, or red so your thumbnail stands out and catches attention in a crowded feed.
FREQUENTLY ASKED QUESTIONS (FAQs).
How do I make my videos look professional?
Most people think professional videos need expensive gear, but that is not true. Viewers judge your video in the first few seconds based on three things: clear audio, steady footage, and good lighting. Improve your audio by recording in a quiet, soft room and using a simple mic. Use natural light from a window, and keep your camera steady by placing it on a stable surface. You do not need better equipment, you just need better choices.
Why do my videos look bad on TikTok?
TikTok often reduces your video quality because it compresses uploads automatically. This can make your video look blurry even if it was clear before. To fix this, turn off Data Saver in settings and enable “Upload HD” before posting. Also, export your video in 1080p (not 4K) with a 9:16 ratio for the best quality.
How to look attractive on video?
Looking good on camera is not about your looks, it is about your energy, eye contact, and setup. Place your camera slightly above eye level, tilt your chin a little down, and use soft light from the front for a clean, flattering look. Most importantly, look into the camera lens (not the screen) to create real connection and confidence.
Why is my video blurry after uploading?
Platforms like YouTube, Instagram, and TikTok compress your videos, which can reduce quality. To keep your video sharp, export it in 1080p using H.264 with a bitrate around 8–12 Mbps. If your YouTube video looks blurry at first, wait up to an hour, HD quality usually appears after processing.
What is the 180 rule in videography?
Breaking the 180 rule can confuse viewers and make your video feel disorienting. This rule means keeping your camera on one side of an imaginary line so people always face the same direction. Just pick one side and stay there while filming to keep your shots clear and easy to follow.
How to make good video for YouTube.
You have been posting videos, putting in real effort, maybe even losing sleep over them, but your views are not growing and your subscribers feel stuck. It starts to feel like maybe you are the problem… like you are just not good enough. But that is not true. The real reason your videos still look unprofessional has nothing to do with talent, expensive gear, or luck, it comes down to a few simple mistakes that no one clearly explained to you before.
And here is the best part: these mistakes are completely fixable. You do not need a studio, you do not need high-end equipment, your phone, your space, and your ideas are already enough to create videos that look clean, professional, and worth watching. By now, you have seen exactly what is been holding your videos back, from poor audio and bad lighting to weak thumbnails, low confidence, and wrong platform strategy. These are the real reasons viewers click away, not because your content isn’t valuable.
The moment you start fixing these small things, everything begins to change. Your videos feel better, your message becomes clearer, and viewers start staying longer, engaging more, and coming back again.
Keep improving, keep testing, and most importantly, keep showing up. Because once you fix what makes your videos look unprofessional, you are not just creating content anymore… you are building something people actually want to watch.