
YouTube Automation Workflow Template – 9 Powerful Steps(Blog#:45)
Many YouTube creators feel overwhelmed every day. They spend hours searching for ideas, writing scripts, editing videos, and still struggle to grow their channels. The main reason is simple: they do not have a clear YouTube Automation Workflow Template to guide their process. Without a structured YouTube Automation Workflow Template, content creation becomes random and exhausting. You may work hard, but without a clear system, it is easy to waste time on the wrong tasks and feel stuck.
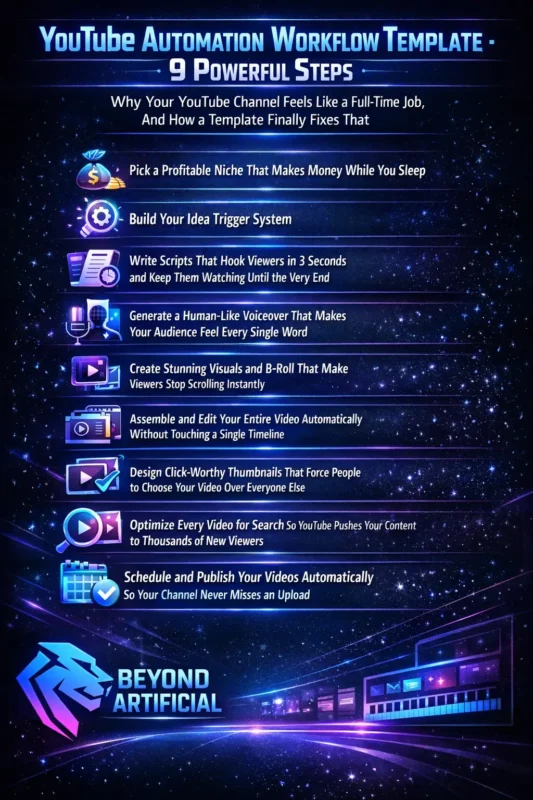
The good news is that a simple workflow can change everything. When you follow a clear process, every step of creating a video becomes easier, from finding video ideas to publishing the final content. In this guide, you will discover 9 powerful steps that help creators organize their entire YouTube automation process. These steps show you how to move from a simple idea to a fully published video while using modern AI tools to save time and effort.
If you want a clearer system, less stress, and a smarter way to create videos, this YouTube Automation Workflow Template can help you build a more consistent and scalable YouTube channel.
Keep reading to discover the complete YouTube Automation Workflow Template that turns scattered ideas into a clear, repeatable system for creating videos faster and more efficiently.
If you want to understand how a full automation system works from start to finish, explore our detailed guide on the YouTube Automation Workflow to see how successful creators structure their entire content process. Creators can also learn more about growing their channel from the official YouTube Creator Academy.
Why Your YouTube Channel Feels Like a Full-Time Job, And How a Template Finally Fixes That
Many YouTube creators feel like running a channel is a full-time job. You spend hours searching for video ideas, writing scripts, editing videos, and managing uploads, yet your channel still grows slowly. The problem is usually not a lack of talent or effort. Most creators struggle because they do everything manually and start from scratch with every new video. Without a clear system, the process becomes tiring and confusing.
This is where a YouTube Automation Workflow Template can make a big difference. A template gives your content creation process a clear structure. Each step, from idea research to publishing, has a defined task and the right tool to complete it. Instead of guessing what to do next, you simply follow the workflow. A good first step is to review your current process. Write down every task you do when creating a video, from finding an idea to publishing it.
This simple exercise often shows where most of your time is being wasted.
Next, focus on improving just one step at a time. Start with the task that takes the most time, maybe research, scripting, or editing, and automate that part using the right AI tool. Over time, your workflow becomes faster and more organized. Many successful creators treat their automation workflow as a system they improve regularly. Small improvements each month can save hours of work.
When you finally follow a clear workflow and produce a polished video in much less time, you realize something important: running a YouTube channel does not have to feel like a second job when you have the right system in place.
Step 1: Pick a Profitable Niche That Makes Money While You Sleep( before you touch any tool)
Before using any AI tool, writing a script, or creating visuals, the first and most important step in your YouTube automation journey is choosing the right niche. Even the best automation tools cannot grow a channel if the topic has little demand or low monetization potential. A successful YouTube channel usually sits at the intersection of three things: audience interest, strong search demand, and advertiser spending.
In simple terms, a profitable niche is not just something you enjoy talking about. It is a topic that people actively search for and that businesses are willing to advertise in. In 2026, niches like finance, health, self-improvement, technology, and digital marketing are among the highest-paying categories on YouTube. Channels in these areas often have strong advertiser demand, which can lead to better monetization opportunities.
Before committing to a niche, it is helpful to validate your idea using tools like VidIQ or TubeBuddy. These tools show search demand, competition levels, and trending topics so you can see whether your niche has real growth potential. It is also a good idea to study a few successful channels in the same niche. Look at their most popular videos, content style, and video length. This research can give you valuable insights into what works well in that space.
Once you find a niche that combines strong demand, monetization potential, and your personal interest, your YouTube strategy becomes much clearer. Instead of guessing what to create, you can build your automation workflow around a niche that already has proven potential.
Step 2: Build Your Idea Trigger System( the smart way to never run out of video topics again)
Many YouTube creators face the same frustrating moment, sitting in front of a blank screen and struggling to think of the next video idea. Hours can pass without progress, and suddenly your upload schedule starts falling behind. A simple solution to this problem is building an Idea Trigger System.
An Idea Trigger System is basically a place where you collect and organize potential video ideas before you need them. You can create this system in a Google Sheet or Airtable and continuously add new ideas as you discover them. Instead of searching for ideas only when you need to upload a video, you build a growing list of topics that are already researched and ready to use. This makes your content creation process much smoother.
You can find new ideas using tools like Perplexity, ChatGPT, VidIQ, or TubeBuddy. These tools help you discover trending topics, popular keywords, and questions people are asking in your niche. It is also helpful to look at competitor channels and YouTube comments. Sometimes viewers directly ask questions in the comments, which can become great video ideas. To keep your system organized, you can score each idea based on three simple factors:
- Search demand
- Monetization potential
- Difficulty of creating the video
- This helps you prioritize the best ideas first.
When you maintain a well-organized idea system, you will always have a list of video topics ready to go. Instead of feeling stuck or stressed about what to create next, you can simply pick an idea from your list and start producing your next video.
Step 3: Write Scripts That Hook Viewers in 3 Seconds and Keep Them Watching Until the Very End.
On YouTube, the first few seconds of your video are extremely important. If viewers are not interested right away, they often click away quickly. When that happens, watch time and audience retention drop, and the algorithm is less likely to recommend your video. This is why a strong video script matters so much.
A good YouTube script is more than just explaining a topic. It should start with a strong hook that immediately grabs attention, keep viewers curious throughout the video, and deliver clear value that makes them want to keep watching. In 2026, many creators will use AI tools like ChatGPT or Claude to speed up this process. These tools can help generate structured scripts with hooks, smooth transitions, and clear storytelling in just a few minutes.
To get the best results from AI, give it a clear prompt. Include details like:
- Who your target viewer is
- The main problem your video solves
- The key takeaway or transformation viewers will get
The more specific your prompt is, the better the script usually becomes. It is also helpful to avoid common openings like “Welcome back to my channel” or “In this video I will show you…”. Instead, start with something that creates curiosity, such as a surprising fact, a relatable problem, or an interesting question. A simple structure that works well for many videos is the PAS framework:
- Problem: Introduce the issue your viewer is facing
- Agitation: Explain why the problem matters
- Solution: Show the solution clearly and practically
When your script follows a clear structure and starts with a strong hook, viewers are much more likely to stay until the end of the video. Over time, improving your scripting skills can make a big difference in your audience retention and overall channel growth.
Step 4: Generate a Human-Like Voiceover That Makes Your Audience Feel Every Single Word.
Even if your script is strong and your visuals look great, a poor voiceover can quickly make viewers lose interest. If the voice sounds robotic or emotionless, people often click away within seconds. That is why a natural and engaging voiceover is an important part of your YouTube automation workflow.
Today, AI tools like ElevenLabs, PlayHT, and Murf AI can generate very realistic voices. These tools turn your script into clear, human-like audio without needing a microphone or recording setup. Using AI voice tools also helps you keep a consistent voice style across all your videos. Over time, this voice can become part of your channel’s identity and help viewers recognize your content.
When choosing a voice, think about the tone that fits your niche:
- A calm and authoritative voice works well for finance, history, or documentary channels.
- A friendly and energetic voice works better for lifestyle, self-improvement, or motivational content.
It also helps to format your script properly before generating the voiceover. Instead of pasting the entire script as one block of text, break it into smaller sections and add commas or pauses where needed. This can make the voice sound more natural. Another useful trick is to generate a few different versions of the opening lines. Listen to each one and choose the version that sounds the most natural and engaging.
When your voiceover sounds clear, warm, and natural, it makes your entire video feel more professional and enjoyable for viewers.
Step 5: Create Stunning Visuals and B-Roll That Make Viewers Stop Scrolling Instantly
On YouTube, visuals matter a lot. Viewers decide very quickly whether a video looks interesting or not. If the visuals feel repetitive or boring, people often lose interest and click away. That is why using strong visuals and B-roll is an important part of your YouTube automation workflow. Today, creators can use AI tools like MidJourney, Leonardo AI, and Runway ML to generate unique visuals and improve the overall quality of their videos. These tools make it easier to create original images and clips without needing expensive production equipment.
Your visuals should support the message of your script. For example:
- Use dramatic visuals when explaining a problem or challenge.
- Use bright or positive imagery when presenting the solution.
- Use wide or cinematic visuals for strong closing moments.
Matching visuals with the tone of your script can make the video feel more engaging and easier to follow. It is also helpful to vary your visual style from time to time. If every video looks the same, viewers may start to lose interest. Using a few different visual styles or templates can keep your content fresh. Another useful technique is adding small motion effects to your visuals. Simple zooms, pans, or slow camera movements can make static images feel more dynamic and keep viewers visually engaged.
When your visuals are clear, relevant, and visually interesting, your videos feel more professional, and viewers are more likely to keep watching until the end.
Step 6: Assemble and Edit Your Entire Video Automatically Without Touching a Single Timeline.
For many creators, video editing is the most time-consuming part of running a YouTube channel. It can take hours to combine voiceovers, visuals, and B-roll into a finished video. This is where automation can save a lot of time. In 2026, several tools can help automate much of the editing process. Platforms like Invideo AI, Creatomate, and n8n can combine your script, voiceover, and visuals into a complete video automatically.
Instead of manually editing every clip on a timeline, these tools follow a template that places each element in the correct order. This allows your video to be assembled much faster. After the main video is generated, tools like Descript can help with final adjustments. For example, Descript can remove filler words, adjust pauses, and improve audio clarity. It also allows you to edit parts of the video simply by editing the text.
Before using automation regularly, it is helpful to set up a consistent video template. This template can include your:
- Brand colors
- Fonts
- Intro and outro
- Basic video layout
Once the template is ready, each new video will follow the same style automatically. It is also important to include subtitles in your videos. Many viewers watch videos without sound, so subtitles can improve accessibility and increase watch time. Even when using automation, it is still a good idea to do a quick final review before publishing. A short check can help make sure the visuals match the script, and everything looks correct.
When your editing process becomes organized and automated, producing videos becomes much faster and less stressful. Instead of spending hours editing, you can focus more on creating ideas and growing your channel.
Step 7: Design Click-Worthy Thumbnails That Force People to Choose Your Video Over Everyone Else.
Your thumbnail is one of the most important parts of your YouTube video. It is usually the first thing viewers notice before they read the title or watch the video. If a thumbnail looks boring or unclear, people may scroll past it, even if the video itself is great. That is why creating click-worthy thumbnails is essential for growing your channel. A good thumbnail should quickly grab attention and make viewers curious. In most cases, simple designs work best.
Use strong colors, clear visuals, and a single main focus that is easy to understand at a glance. Many creators use tools like Canva, MidJourney, or Adobe Firefly to design thumbnails. These tools make it easier to create clean and professional designs, even if you do not have graphic design experience.
Your thumbnail and title should work together. The thumbnail should catch attention visually, while the title gives just enough information to make viewers want to click and learn more. It is also important to keep text on thumbnails short. Usually, three to five words are enough. Too much text can make the thumbnail look crowded and harder to read on small screens. Another helpful strategy is testing different designs. Even small changes in color, layout, or wording can improve your click-through rate (CTR).
When your thumbnails clearly stand out in search results and suggested videos, more people are likely to choose your video, which can lead to more views and better channel growth.
Step 8: Optimize Every Video for Search So YouTube Pushes Your Content to Thousands of New Viewers.
Even if your video is well-made, people may never see it if it is not optimized for search. YouTube’s algorithm needs clear signals to understand what your video is about and who should see it. This is where YouTube SEO becomes important. YouTube SEO simply means placing the right keywords in your title, description, tags, and video chapters so the platform can match your content with people who are searching for that topic.
Today, tools like VidIQ, TubeBuddy, ChatGPT, and Claude can help with this process. They can suggest keywords, generate SEO-friendly titles, and help you write descriptions that improve your chances of appearing in search results. Before publishing a video, it is helpful to research your main keyword using tools like VidIQ or TubeBuddy. Look for keywords with good search volume but lower competition. This can make it easier for your video to get discovered.
When writing your video description, try to keep it natural and informative. Mention your main keyword in the first one or two sentences, since these lines are often important for search and also appear as preview text. Avoid stuffing your description with too many keywords. Instead, write a clear paragraph that explains what viewers will learn from the video. You can also add video chapters with timestamps. This helps viewers navigate the video more easily and can improve how your content appears in search results.
When your videos are properly optimized, YouTube can better understand your content and recommend it to viewers who are already interested in that topic. Over time, this can bring steady organic traffic to your channel.
Step 9: Schedule and Publish Your Videos Automatically So Your Channel Never Misses an Upload.
Consistency plays a big role in growing a YouTube channel. Channels that upload regularly often receive more visibility from the algorithm and build stronger connections with their audience. However, many creators struggle to stay consistent because creating and publishing videos takes a lot of time. This is where automatic scheduling and publishing can help.
Once your video is finished and optimized, you can schedule it to be published automatically. Tools like Make.com, Zapier, or the YouTube API can help automate this step so your video goes live at the scheduled time without needing manual action. You can also use YouTube’s built-in scheduling feature to plan your uploads. This makes it easier to maintain a consistent posting schedule.
Before setting your publishing schedule, check YouTube Studio analytics to see when your audience is most active. Publishing videos when viewers are online can help increase early engagement, which may improve your video’s reach. It is also helpful to test different days and times occasionally. Audience behavior can change over time, so small adjustments can sometimes improve performance.
Another useful strategy is keeping a content buffer. Having several finished videos ready to publish ensures your channel stays consistent even if you become busy or face unexpected delays. When your videos are scheduled and your workflow is organized, your channel can continue publishing content regularly while you focus on planning new ideas and improving your content strategy.
How to Test, Track, and Improve Your Automation Template.
Many creators build a YouTube automation workflow and then stop analyzing how it performs. They upload videos and move on to the next one without checking what is actually working and what needs improvement. But improving your system is just as important as building it.
Think of your YouTube automation template as a system that should get better over time. By reviewing your results regularly, you can understand which parts of your process are helping your channel grow and which parts need adjustment.
A good starting point is checking your YouTube Studio analytics every week. Focus on a few key metrics:
- Click-through rate (CTR): Are people clicking your thumbnails and titles?
- Audience retention: Are viewers watching most of the video?
- Subscriber growth: Are your videos bringing new subscribers?
These numbers help you understand what type of content performs best on your channel. When you decide to improve something, try changing one element at a time. For example, you might test a new thumbnail style or a different script hook. Making small changes helps you clearly see what actually improves performance. It can also help to track your results in a simple Google Sheets dashboard. You can record metrics such as:
- Average CTR
- Average view duration
- Subscriber growth
- Views per video
Looking at these numbers together over time makes it easier to notice patterns and opportunities for improvement. As you continue testing and refining your workflow, your system becomes stronger. Small improvements, like a better hook, clearer visuals, or stronger thumbnails, can gradually lead to higher watch time and steady channel growth.
FREQUENTLY ASKED QUESTIONS (FAQs).
How to successfully do YouTube automation?
YouTube automation works best when you build a simple system using AI tools for each step of content creation. For example, use tools for idea research, script writing, voiceovers, video creation, and scheduling. The key is to follow a clear workflow and keep improving it by checking your YouTube analytics regularly.
Which AI tool is best for YouTube automation?
There is not just one tool that handles everything. Most creators use a combination of AI tools. For example, Perplexity for research, ChatGPT or Claude for scripts, ElevenLabs for voiceovers, Invideo AI for video creation, and Make.com to connect and automate the whole workflow. Using the right mix of tools helps make the process faster and more efficient.
Is YouTube automation actually profitable?
Yes, YouTube automation can be profitable, but it depends on a few key factors. Choosing a good niche, uploading consistently, and optimizing your videos all play an important role. Many creators earn money through YouTube ads, affiliate marketing, sponsorships, and digital products once their channel starts growing.
Which content is best for YouTube automation?
The best content for YouTube automation is evergreen and information-based topics that do not require showing your face. Popular niches include finance, self-improvement, AI tools, health, business, history, and motivational content. These topics work well because they can be created using scripts, voiceovers, and visuals instead of real footage.
What is the cost of YouTube automation?
YouTube automation can start with little or no cost because many AI tools offer free plans for scripting, voiceovers, visuals, and editing. As your channel grows, you may choose to upgrade to paid tools for better quality and faster automation, but many creators start with free tools and scale later.
YouTube automation workflow template free
Many creators watch other YouTube channels grow quickly and wonder how they manage to upload videos so consistently. It often looks effortless from the outside, but in reality, most successful creators follow a clear system that helps them produce content efficiently. The challenge is that many beginners try to handle every step manually — from finding video ideas to editing and publishing. Without a clear workflow, the process can quickly become overwhelming and time-consuming.
That is where a YouTube Automation Workflow Template can help. This free template gives you a simple, structured process for creating videos step by step. It shows you what to do at each stage and which tools can help make the process faster and easier. The best part is that you can build this system using free AI tools, so you do not need a large budget or a team to get started.
With the right workflow in place, your channel becomes much easier to manage. Instead of feeling lost or stressed, you simply follow the system and focus on improving your content. Here is what this free template helps you do:
- Low budget? Many of the tools in this workflow offer free plans that are enough to get started.
- New to YouTube? The steps are simple and beginner-friendly.
- Limited time? Automation tools can speed up tasks like scripting, voiceovers, and editing.
- No video ideas? AI research tools can help you find trending topics and keywords.
- Feeling overwhelmed? A clear workflow removes confusion and gives you a repeatable process.
- Struggling with consistency? Scheduling tools help you publish videos regularly.
Once this workflow is set up, creating and publishing videos becomes much more organized and manageable. Over time, this consistency can help your channel grow steadily.