
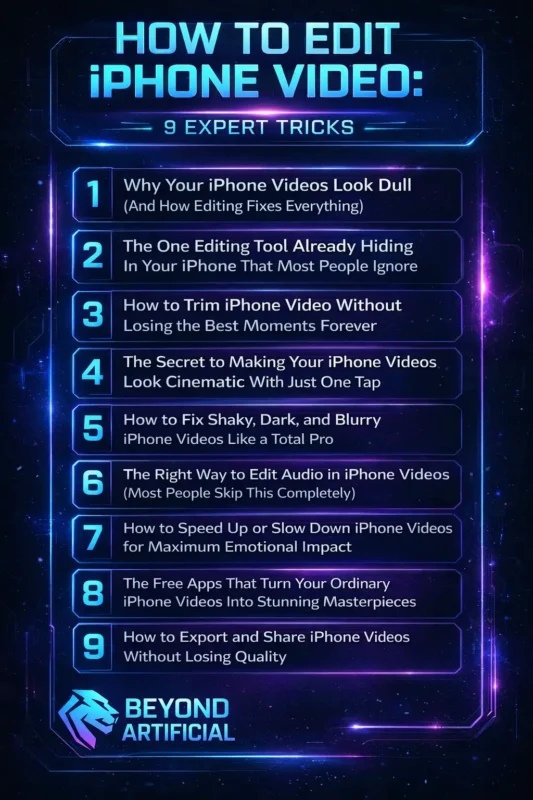
How to Edit iPhone Video: 9 Expert Tricks(Blog#:22)
Your iPhone captures precious memories, but most videos stay raw and unedited because people do not know how powerful their phone really is. Learning how to edit iPhone video can turn shaky, boring clips into beautiful stories that grab attention.
The best part? You do not need expensive apps or professional skills to learn how to edit iPhone video like a pro. Many people feel confused and frustrated when their videos do not match their vision, but that can change today. Your iPhone is more powerful than you think; it’s not just a camera; it’s a storytelling machine in your pocket. Most people shoot videos every day, but very few know how to edit iPhone videos the right way.
If you are ready to turn simple clips into eye-catching, professional-looking content, you are in the right place. Start editing smarter today, follow these 9 powerful steps, and transform your iPhone videos into scroll-stopping masterpieces.
Keep reading to explore these simple and expert tips that will help you take full control of your editing and turn everyday moments into videos people love to watch.
1. Why Your iPhone Videos Look Dull (And How Editing Fixes Everything)
Your iPhone videos often look dull because of poor lighting, shaky hands, and no editing at all. Many people record a special moment, watch it later, and feel disappointed because the video does not look as beautiful as it did in real life. The truth is, your iPhone records raw footage that needs a few simple edits to really shine and feel alive. Start by shooting your videos in good natural light whenever possible. Lighting alone can turn a flat and lifeless clip into something bright, warm, and visually pleasing.
After recording, open the Photos app and make small adjustments like increasing exposure, contrast, and saturation. Even slight changes can make your video look more polished and professional. Do not ignore color correction, because dull and washed-out colors are one of the main reasons iPhone videos look cheap or boring. When you fix the colors and brightness, your video instantly feels more vibrant and engaging. Always remember, you are not bad at shooting videos; you just need the right editing steps.
Once you apply these simple tips, your everyday clips will turn into beautiful memories you will actually love watching and sharing.
2. The One Editing Tool Already Hiding in Your iPhone That Most People Ignore.
There is a powerful video editing tool already built into your iPhone that many people ignore every day. Apple has added a complete editing feature inside the Photos app, but most users do not realize how useful it really is. You can trim clips, fix colors, add filters, adjust speed, and even straighten your video in just a few seconds without downloading any extra apps. Many people keep installing third-party editing apps and filling up their storage, even though everything they need is already on their phone.
To use it, simply open your Photos app, select any video, and tap the Edit button in the top right corner. As soon as you tap it, a full editing toolbar appears at the bottom of your screen with all the basic tools you need. Use the adjustment tools to change brightness, contrast, saturation, and sharpness, because these small edits can instantly make your video look clearer and more professional. You can also use the crop tool to straighten a tilted video and remove unwanted edges from your frame.
A clean and straight frame makes your video look more focused and polished. Do not ignore this hidden editing feature inside your iPhone. Once you start using it, you will realize you do not always need heavy apps to create beautiful videos. Your Photos app already has everything to turn simple clips into high-quality memories worth sharing.
3. How to Trim iPhone Video Without Losing the Best Moments Forever
Trimming your iPhone video is one of the most powerful edits you can make. It removes the boring or awkward parts and keeps only the moments that truly matter. A well-trimmed video feels cleaner, more emotional, and much more enjoyable to watch. Many people make a mistake by tapping “Save Video” after trimming, not realizing it can overwrite the original clip. That can feel scary, especially if the video is a special memory.
The good news is that your iPhone gives you a safer option. Always tap “Save Video as New Clip” instead. This keeps your original video safe and creates a new trimmed version right next to it. To trim your video, open it in the Photos app and tap Edit. Then drag the yellow handles on both sides of the timeline to select the exact part you want to keep. Move them slowly until you capture the best moment. If you ever make a mistake, do not panic. Tap Edit again and choose “Revert”; your iPhone keeps the original version hidden and ready to restore.
Think of trimming like shaping a story. You are not just cutting parts out; you are keeping the most meaningful moments and turning a simple clip into a memory that feels powerful and worth watching again.
4. The Secret to Making Your iPhone Videos Look Cinematic With Just One Tap
Your iPhone has a hidden feature that can make your videos look more cinematic in just one tap. Many people do not realize that the built-in filters inside the Photos app can quickly turn a simple, flat video into something bright, dramatic, and eye-catching. The amazing videos you see on YouTube, Instagram, and TikTok are not always made with expensive cameras; they just use the right filter on an iPhone.
To use filters, open your video in the Photos app and tap Edit. Then tap the icon with three overlapping circles to see different filters like Vivid, Dramatic, Noir, and Silvertone. Each filter changes the mood of your video and gives it a unique style. Take your time and preview each filter slowly to see which one matches your video best.
Do not use filters at full strength, because that can make your video look too edited or fake. Instead, reduce the filter intensity to around 60–70% for a more natural and professional look. With just a simple filter and small adjustments, your iPhone videos can look more beautiful, emotional, and ready to share with others.
5. How to Fix Shaky, Dark, and Blurry iPhone Videos Like a Total Pro
Shaky, dark, and blurry iPhone videos can feel disappointing, especially when the real moment was beautiful. Many people delete these videos because they think they cannot be fixed. But the truth is, your iPhone already has simple tools that can improve these problems quickly and easily. You do not need expensive gear or expert skills to save your footage. If your video is shaky, you can fix it using a free app like CapCut. Just open your video, tap the stabilization feature, and it will smooth out the shaking so your footage looks steadier and more professional.
For dark videos, open the video in your Photos app, tap Edit, and increase the Exposure and Brilliance. Brightening your video can bring back details and make it look clear and lively again. If your video looks blurry, use the Sharpness and Definition sliders in the Photos editing tools. Even a small increase can make your video look clearer and more polished. Always try these simple fixes before deleting any video.
Some of your most special memories only need a few small edits to look beautiful and worth keeping.
6. The Right Way to Edit Audio in iPhone Videos (Most People Skip This Completely)
Many people focus only on how their iPhone videos look and forget about the sound. But bad audio can ruin a good video faster than anything else. Viewers might ignore a shaky video or low lighting, but if the sound is noisy, muffled, or full of background chaos, they will quickly stop watching. Good audio makes your video feel clearer, more professional, and emotional. To fix audio quickly, open your video in the Photos app and tap Edit.
Then tap the speaker icon to mute the original sound if there is too much noise or distraction. If the original audio isn’t important, muting it can instantly make your video feel cleaner and more watchable. If your video needs music, you can use apps like iMovie or CapCut to add a soft background track. Choose simple, royalty-free music that matches the mood of your video. Always keep the music volume low, around 20–30%, especially if people are speaking in the video. The music should support the moment, not overpower it.
Never ignore audio when editing your videos. People may watch with their eyes, but they connect with a video through sound. Clean and balanced audio can make your iPhone videos feel more powerful and enjoyable to watch.
7. How to Speed Up or Slow Down iPhone Videos for Maximum Emotional Impact
Changing the speed of your iPhone video is a simple editing trick that can completely change how your video feels. Slowing down a special moment helps viewers notice the emotion and beauty in the clip. Speeding up long or boring parts keeps your video interesting and fun to watch. Speed editing is not just a feature; it helps you tell a better story. To slow down a video, open it in the Photos app and tap Edit.
Then tap the speed icon (it looks like a timer) and drag the slider to the left. A gentle, slow-motion effect on moments like laughter, nature, or special memories can make your video feel more emotional and cinematic. If a clip feels too long or repetitive, you can speed it up instead. Use the same speed slider or try apps like CapCut to increase the speed to 2x or 4x. This makes your video faster, more exciting, and easier to watch without losing attention.
Always choose the speed based on the feeling you want to show. Slow motion makes a moment feel important and emotional, while fast motion keeps the energy high and engaging. When used carefully, speed changes can turn a simple video into a powerful and memorable story.
8. The Free Apps That Turn Your Ordinary iPhone Videos Into Stunning Masterpieces.
Your iPhone’s built-in editing tools are great, but free editing apps can take your videos to the next level. These apps offer features that the Photos app does not have, like smooth transitions, cool effects, auto-captions, and advanced color editing. The best part? You do not have to spend any money to use them. One great option is iMovie. It’s Apple’s free editing app that lets you combine multiple clips, add clean transitions, insert titles, and include background music.
It’s simple to use and perfect for creating polished, professional-looking videos. Another powerful app is CapCut. Many viral creators use it because it offers auto-generated captions, trendy effects, speed controls, background removal, and one-tap enhancements. It makes it easy to turn basic footage into eye-catching content in just minutes. A smart way to edit is to start in the Photos app for quick fixes like trimming and brightness. Then move your video into CapCut or iMovie for more advanced edits.
Do not feel nervous about using these apps; they are made for beginners. With just a little practice, you can create videos that look so good people will wonder what camera you used.
9. How to Export and Share iPhone Videos Without Losing Quality.
You spend time and effort editing your iPhone video, so it feels very frustrating when the final video looks blurry or low quality after exporting. Many people lose video quality because they choose the wrong settings or share the video through apps that compress it. The good news is that you can keep your video quality high if you use the right steps. Always export your video in the highest resolution available. Go to Settings → Photos and turn on Keep Originals so your iPhone does not automatically compress your videos.
This helps protect the original quality of your footage. When sharing your video, avoid sending it through apps like WhatsApp or iMessage because these apps reduce quality to save space. Instead, upload directly to platforms like Instagram or TikTok from your gallery. If you want to send the video to another Apple device, use AirDrop because it transfers the video in full quality without compression.
After all the effort you put into editing, do not let poor export settings ruin your work. Use the right sharing methods so your videos stay clear, sharp, and beautiful every time you watch or share them.
FREQUENTLY ASKED QUESTIONS(FAQs)
How do I cut out part of a video on my iPhone?
Cutting a part of a video on your iPhone is very simple, and you can do it using the Photos app. Open the video in Photos, then tap Edit. You will see yellow handles on both sides of the timeline; drag them inward to select the part of the video you want to keep. When you are finished, tap “Save Video as New Clip,” so your original video stays safe. Your trimmed video will be saved as a new clip right next to the original.
How do I remove unwanted things from a video?
Removing unwanted objects from your iPhone video is quick and easy. Use CapCut’s free background remover or object eraser to delete distractions in seconds. If something appears on the edges, open your video in Photos, tap Edit, and use the crop tool to remove it and clean up your frame.
Is there any video editor in iPhone?
Your iPhone already has a powerful video editor built in, but many people do not know about it. Inside the Photos app, you can trim videos, adjust colors, add filters, change speed, crop clips, and even control audio without downloading any extra apps. If you want more advanced editing, you can download iMovie for free from the App Store. It lets you combine clips, add transitions, titles, and music, turning your iPhone into a simple but professional video editing tool.
What video cutter is good for beginners?
CapCut is one of the best video cutters for beginners because it is powerful but very easy to use. You can split, trim, cut, and move clips with just a few taps. Its simple timeline makes editing feel clear and stress-free, even if you have never edited a video before. If you want something even easier, the built-in Photos app on your iPhone is a great place to start. It lets you make clean and quick cuts without any complicated menus or confusing tools
What is the easiest video editing software?
The easiest video editing tool for iPhone is the built-in Photos app. It needs no experience or downloads and lets you edit videos quickly in seconds. If you want more features, try CapCut or iMovie. Both are free, simple to use, and perfect for beginners who want better-looking videos.
How to edit video on iPhone 16
The iPhone 16 gives you powerful video editing tools right in your pocket, but many people record videos and do not know what to do next. If you have ever looked at your video and felt disappointed because it does not match the real moment, you are not alone. The good news is that editing your video on iPhone 16 is simple once you know the right steps. Here’s how to edit video on iPhone 16 and turn your raw clips into beautiful, professional-looking videos:
1. Open your video in the Photos app and tap Edit to use Apple’s built-in editing tools without downloading any apps
2. Adjust brightness, contrast, and saturation to make your video look more vibrant and clear
3. Use iMovie or CapCut if you want to combine clips, add music, transitions, or special effects
4. Save as a new clip so your original video always stays safe
5. Export in full quality by turning on Keep Originals in your settings before sharing
Your iPhone 16 is more than just a camera; it’s a complete video editing tool. Once you learn these simple steps, your videos will start looking more polished, emotional, and ready to share with everyone.