
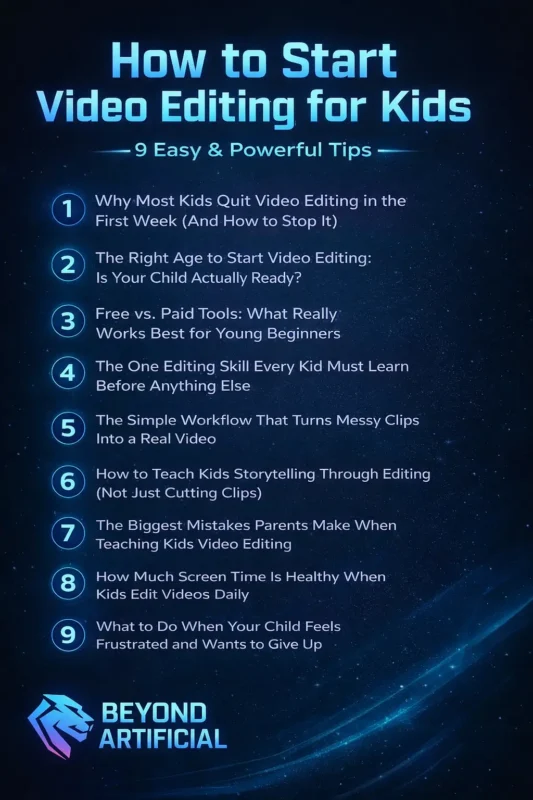
How to Start Video Editing for Kids -11 Easy & Powerful Tips(Blog#:21)
Every parent has seen it: their child sitting for hours watching videos on a screen. But what if that same screen time could turn into a real, useful skill? Learning how to start video editing for kids may sound complicated at first, but it is actually much easier than most parents think. You do not need expensive software, professional equipment, or technical knowledge. Video editing for kids can start with something as simple as a smartphone, a basic laptop, and a little creativity.
Instead of just consuming content, you and even your child can begin creating their own fun videos, short stories, mini vlogs, or simple school projects. When you introduce video editing for kids in the right way, you give your child more than just a hobby. You help them build confidence, improve focus, learn patience, and express their imagination. They start to see that they can turn ideas into something real, and that feeling is powerful.
Many parents give up before even starting because they think it is too technical or too advanced. The truth is, kids learn fast, especially when they are excited. With the right guidance and simple steps, any child can begin today and enjoy the process without pressure.
These 11 easy and powerful tips will gently guide you and your child from complete beginners to proud young creators, one small, fun project at a time.
1. Why Most Kids Quit Video Editing in the First Week (And How to Stop It)
Most kids do not quit video editing because they are not talented. They quit because the beginning feels confusing and frustrating. When a child opens a video editing app for the first time and sees too many buttons, tools, and options, they can quickly feel lost. If no one guides them and they hear “just figure it out,” their excitement disappears. The real problem is not the child, it is the overwhelming start. What should feel fun suddenly feels hard. That early confusion can quietly destroy their motivation in just a few minutes.
The best way to prevent this is to start very small. Instead of trying to make a big, perfect video, help your child create one simple project. Let them record something personal, like their pet, their favorite toy, their meal, or their room. Then edit only that short clip. Keeping it simple makes learning feel fun instead of stressful. Another important step is to celebrate small wins. If your child learns how to trim one clip or add one piece of music, praise them. Those small successes build confidence and make them want to continue.
Also, do not expect them to finish everything in one day. Break the project into small steps and spread it out. When progress feels easy and manageable, kids are much more likely to stick with it. In the end, children continue video editing when they feel supported, encouraged, and not rushed. The first week matters the most, and with patience and simple guidance, it can become the start of a long and creative journey.
2. The Right Age to Start Video Editing: Is Your Child Actually Ready?
Every parent wonders, Is my child really old enough to start video editing?The honest answer is simple: age matters less than readiness. What truly matters is whether your child is curious, patient, and excited to create. Many children begin to show real readiness between 7 and 10 years old. Around this age, their attention span improves, they become more curious about how technology works, and they start wanting to create their own stories instead of just watching others.
Instead of focusing only on birthdays, watch your child closely. Are they replaying videos to see how effects work? Do they ask questions about how YouTubers edit? Do they enjoy recording random moments on their phone? These are strong signs that they may be ready. Here are three simple readiness signs to look for:
- They watch videos carefully, not just casually.
- They enjoy telling stories, drawing, or acting things out.
- They like recording small moments on a phone or tablet by themselves.
If your child is younger than 7, there is no need to rush. Start very simply. You can use beginner-friendly tools like Google Photos or Microsoft Clipchamp to create easy photo slideshows with music. This keeps creativity fun without too many complicated buttons. For children aged 10 and above, you can slowly introduce slightly more advanced apps like CapCut or iMovie. Give them small projects, such as editing a family birthday video or making a short school-day vlog. Keep the projects simple and enjoyable.
3. Free vs. Paid Tools: What Really Works Best for Young Beginners
Many parents make a costly mistake at the beginning; they spend money on expensive video editing software before their child has even edited one simple clip. Later, they realize it was not necessary. The good news is this: free apps are more than enough for beginners. In fact, they are often the best place to start. Free tools like iMovie, CapCut, and VLLO are designed to be simple, friendly, and powerful. They include music, text, transitions, and fun effects, everything a child needs to create exciting videos.
On the other hand, professional software like Adobe Premiere Pro is made for adults working on advanced projects. Giving that to a beginner can feel overwhelming — like handing a racing car to someone who has never learned to ride a bicycle. Here’s a simple way to choose:
- If your child uses an iPhone or iPad, start with iMovie. It is free, clean, and very easy to understand.
- If your child uses an Android device, try CapCut. It offers many creative features but keeps the layout simple.
- VLLO is another good option for beginners who want something fun and easy on mobile.
Only think about upgrading to paid software after your child has been editing for a few months and truly feels limited by their current app. If they start asking for more advanced features and showing serious interest, that is the right time to consider something bigger. Remember, the best tool is not the most expensive one. It is the one that feels fun, simple, and encouraging, the one that makes your child excited to create again tomorrow.
4. The One Editing Skill Every Kid Must Learn Before Anything Else
If you teach your child only one video editing skill at the beginning, make it the trim (cut) tool. Trimming is the foundation of all great videos. It simply means cutting out mistakes, removing boring parts, and keeping only the best moments. When a child learns how to trim properly, they learn how to turn messy footage into a clear and interesting story. Every professional editor, whether working on YouTube videos, TV shows, or even movies, uses this skill again and again. It may look simple, but it is the most important part of editing.
Here’s an easy way to teach it:
Record a short 2-minute video of anything: a pet, a sibling, a small daily activity. Then ask your child to cut it down to just 30 seconds, keeping only the most fun or important parts. This small challenge teaches them how to choose wisely and think like a real editor. While they trim, ask them one simple question after every cut: “Does this part make the video better, or does it slow it down?” That one question helps them develop strong editing instincts.
Another helpful idea is to let them practice on family videos or holiday clips. When the footage feels personal and meaningful, they care more about making it look good. Encourage them to master trimming before using fancy effects, filters, or transitions. A clean, well-cut video will always look better than a flashy video that feels long and boring. When a child learns how to trim with confidence, they are building the strongest possible foundation for their creative journey.
5. The Simple Workflow That Turns Messy Clips Into a Real Video
Many kids freeze when they open a video editing app, not because they lack creativity, but because they do not know what to do first. A screen full of random clips can feel messy and overwhelming. Without a clear plan, they get confused and close the app. That’s why a simple step-by-step workflow is so powerful. It gives your child a clear path to follow. Instead of guessing, they move forward with confidence.
Teach your child these five simple steps in order: 1. Organize, 2. Rough Cut, 3. Trim, 4. Add Flair, 5. Export. You can even write these steps on a small piece of paper and place it near their screen. When they forget what to do next, they just look at the list. Start with Organize. Help them sort their clips into simple folders like: “Best Clips” “Maybe” “Delete.” This saves time and reduces stress later. Next comes the Rough Cut. Tell them not to worry about perfection. Just place the best clips to form a simple story. This step is about building the shape of the video, not making it perfect.
Then they trim, cutting out boring parts and mistakes. After that, they can Add Flair like music, text, or small effects. Finally, they export and enjoy their finished work. When a child follows the same simple workflow every time, they feel more in control. They finish more videos. They feel proud instead of frustrated. And slowly, they build strong creative habits that even many adults struggle to develop.
A clear plan turns confusion into confidence, and that makes all the difference.
6. How to Teach Kids Storytelling Through Editing (Not Just Cutting Clips)
The difference between a video that people skip after three seconds and one that keeps viewers watching until the very end is not about fancy effects or expensive gear; it’s about story. Most kids learn to cut clips, add music, or drop in transitions, but few are taught the most important skill: how to make people feel something through the story they tell. Storytelling through editing means thinking like a director, not just an editor. It’s about arranging clips so that every moment builds emotion, creates curiosity, and pulls the viewer in.
Here’s an easy way to start: before your child edits a single clip, ask them: “What do you want the person watching this video to feel at the end?” That question becomes their guide for every choice they make. Teach them the simple three-act structure:
Beginning, hook the viewer immediately. Middle: build excitement, emotion, or curiosity. Ending: give a satisfying conclusion that makes the viewer smile, laugh, or feel moved. Another tip: watch short videos together and pause at emotional moments. Ask, “Why did this make you feel something?” This trains them to see emotion in editing, which is the fastest way to learn how to create it themselves.
A child who learns storytelling through editing does not just make videos; they become a young creative voice, able to share something real and powerful that people actually want to watch.
7. The Biggest Mistakes Parents Make When Teaching Kids Video Editing
Most parents try to teach video editing with love and good intentions. But without realizing it, they sometimes make mistakes that hurt their child’s creativity and confidence.
The three biggest mistakes are:
1. Starting with tools that are too difficult.
2. Criticizing the final video instead of praising the effort.
3. Watching too closely and not giving the child freedom to experiment.
These mistakes do not mean parents are bad teachers. It simply means no one showed them how to guide a creative child through a skill that needs patience, freedom, and encouragement.
8. How Much Screen Time Is Healthy When Kids Edit Videos Daily
Screen time can be confusing for parents, especially when a child edits videos every day. Many parents wonder: how much is too much? The truth is, not all screen time is the same.
Watching random videos for hours is very different from creating and learning through video editing. When children edit videos, they are thinking, solving problems, and building useful skills. This type of creative screen time is healthier than just watching. However, even creative screen time needs healthy limits to protect your child’s eyes, sleep, and mood.
Here are some simple rules to follow:
1. Follow the 45-minute rule: Let your child edit for 45 minutes, then take a 15-minute break. During the break, they should stand up, move around, and rest their eyes. This helps them stay fresh and focused.
2.Make a comfortable workspace :Keep the screen at eye level and make sure the room has good lighting. This reduces eye strain and prevents headaches.
3. Avoid editing before bedtime: Do not allow video editing within one hour before sleep. Screens and mental activity can disturb sleep, and a tired child will feel frustrated the next day.
4.Keep clear and loving limits: Children are more creative and happy when they have balanced screen time. Rest, play, and real-life activities help keep their creativity strong.
A child who edits with healthy limits will enjoy learning more and stay inspired for a long time.
9. What to Do When Your Child Feels Frustrated and Wants to Give Up
When your child gets frustrated while editing and says “I quit,” it is not a failure, it is actually a chance for them to grow. Most frustration in video editing comes from three simple reasons: they cannot fix a technical problem, their skills are not yet strong enough to match their creative ideas, or the final video does not look as good as they imagined. Instead of saying “it’s not a big deal,” sit beside your child and gently ask, “Show me what is frustrating you.”
This helps them feel understood and turns the moment into teamwork instead of stress. Keep a small “wins journal” near their editing space and write down every small success after each session, so on difficult days they can look back and see how much they have improved. You can also show them videos of other young creators talking about their struggles, so they know they are not alone. Every great video editor once felt like quitting, but with support and encouragement, children learn to push through frustration and grow more confident and creative.
10. The Secret Way to Make Video Editing Feel Like Play, Not Work
The real secret to making kids fall in love with video editing is simple: make it feel like play, not work. When editing feels like homework, children quickly lose interest and start counting the minutes until they can stop. But when it feels fun and exciting, they get completely absorbed and do not want to quit. Instead of forcing them to practice, let your child edit things they truly enjoy, their favorite pet, best friends, hobbies, or funny family moments.
When they feel emotionally connected to what they are editing, it becomes a fun way to express themselves, not just a technical task. You can also turn editing into fun challenges that feel like games rather than lessons. For example, challenge them to make a 30-second comedy video, a slow-motion action clip, or a mystery video with a surprising ending. These small creative games make learning new skills exciting and keep their imagination active.
Most importantly, celebrate every editing session. Watch their finished video together as a family, give them a high five, or offer a small reward. These simple celebrations help your child connect video editing with happiness and pride. When children feel that editing is fun and rewarding, they stay motivated, creative, and eager to keep improving every day.
11. When Your Child Is Ready to Share Their Videos With the World.
The day your child shyly asks, “Can I post my video online?” is a big moment. It means they are no longer just learning , they are ready to share their creativity with the world. Exciting? Yes. A little scary? Also yes. But before saying yes, it’s important to know that being ready to post online is not only about editing skills. It’s also about emotional maturity, online safety, and understanding that the internet is public and permanent. There are three clear signs your child may be ready.
First, they feel proud of the videos they create. Second, they can accept feedback without getting deeply upset. Third, they understand basic online safety rules and do not need constant reminders. If these signs are there, you can slowly help them step into the online world safely. Start small and safe. Instead of posting publicly, create a private family YouTube channel where only trusted family and friends can watch and comment.
This builds confidence without exposing your child to strangers. Before posting any video, have an honest and calm talk about internet comments. Explain that not every comment will be kind, and negative comments say more about the person writing them than about your child. When kids understand this early, they become stronger and more confident. Also remember: children under 13 should not run public social media accounts alone. Always keep parental access to their accounts so you can monitor comments and keep them safe.
When you guide your child with love, awareness, and clear rules, they do not just become confident creators , they grow into smart, responsible, and safe digital citizens ready to share their voice with the world.
FREQUENTLY ASKED QUESTION (FAQs)
What is the 321 rule of video editing?
The 3-2-1 rule is a simple backup method that keeps your child’s video projects safe. It means always keeping 3 copies of every video, saving them in 2 different places (like a phone and a laptop), and keeping 1 copy in the cloud or on an external drive. This way, if one file is deleted or a device stops working, the video is never lost. Teaching your child this habit from the start protects their hard work and saves them from the frustration of losing a finished project.
Is CapCut ok for 10 year olds?
Yes, CapCut is generally safe and very good for 10-year-olds if parents supervise its use. It has simple tools, a clean layout, and fun features that are perfect for beginners who are just learning video editing. To keep your child safe, turn off social sharing features, disable the “discover” or public content feed, and keep all videos private. Let your child focus only on editing and creating, not posting publicly. With a little parental guidance, CapCut can be a safe and excellent app for young creators.
How to learn editing for kids?
Kids can learn video editing easily by starting with a free app like CapCut or iMovie and practicing right away. Watching simple beginner tutorials with a parent and then trying the steps on real videos helps them learn much faster. The best way to improve is by editing fun personal projects like family moments, pets, or hobbies. With regular practice and no fear of mistakes, kids can build strong editing skills and confidence in just a few weeks.
What is a good video editing app for kids?
Choosing a video editing app for kids can feel confusing, but only a few are truly beginner-friendly. CapCut is one of the best free apps for both Android and iPhone users and is great for most kids. iMovie is perfect for Apple users because it is simple and easy to understand, while VLLO is a great choice for younger children who need a very basic and clean app. The best app is the one that matches your child’s device, age, and skill level, and most importantly, the one that makes them excited to start creating.
Can I self learn video editing?
Yes, video editing is one of the easiest skills to learn on your own. Many successful creators and editors never took formal classes; they learned by practicing. All your child needs is a free editing app, beginner YouTube tutorials, and regular practice on fun personal projects. By creating and experimenting every week, they can quickly build confidence and strong editing skills on their own.
How to start video editing for kids on phone
Your child already has one of the most powerful video editing tools in their hands, your phone. Many parents do not realize that a simple phone can become a complete video editing studio for kids. When children record random clips and never use them, it’s actually a missed creative opportunity. The good news is that learning video editing on a phone is easy, affordable, and the most natural way for kids to turn screen time into a real creative skill. You do not need a computer, expensive camera, or technical knowledge. Just use the phone you already have and follow these simple steps to get started today.
Download one easy editing app like CapCut, iMovie, or VLLO. They are free and ready to use within minutes.
Start with something your child loves. Let them record and edit their pet, food, toys, or a funny family moment.
Keep the first video short. A 30–60 second video is perfect for beginners and feels fun and achievable.
Watch the video together as a family on a big screen. Celebrating their work builds confidence and excitement.
Always save and back up their videos to the cloud so their creative work is safe and never lost.
With just a phone and a little support, your child can begin an exciting video editing journey right away.